Launch the Internet browser window.
Enter the Track Admin application URL into the address bar.
Press the Enter key
on the keyboard to open Track Admin Log In screen.

In order to set up the single sign-on, the user must log in to the Track Admin application with the TrkAdmin account.
Launch the Internet browser window.
Enter the Track Admin application URL into the address bar.
Press the Enter key
on the keyboard to open Track Admin Log In screen.
Enter TrkAdmin into the Username text box.
Enter TrkAdmin's password into the Password text box.
Select a language from the Language drop-down list if the default language is incorrect. Otherwise, proceed to the next step.
Select a database from the Data Source drop-down list if the default database is incorrect. Otherwise, proceed to the next step.
Click the Submit button to open Track Admin application, displaying the Accounts screen.
Directory Type, SSO Url, and Certificate Key are required fields. The information may be obtained through the user’s company network or server administrator.
From the menu bar, hover a mouse pointer over the Tools menu link to display its drop-down menu.
Click Directories to
open the Directory screen.
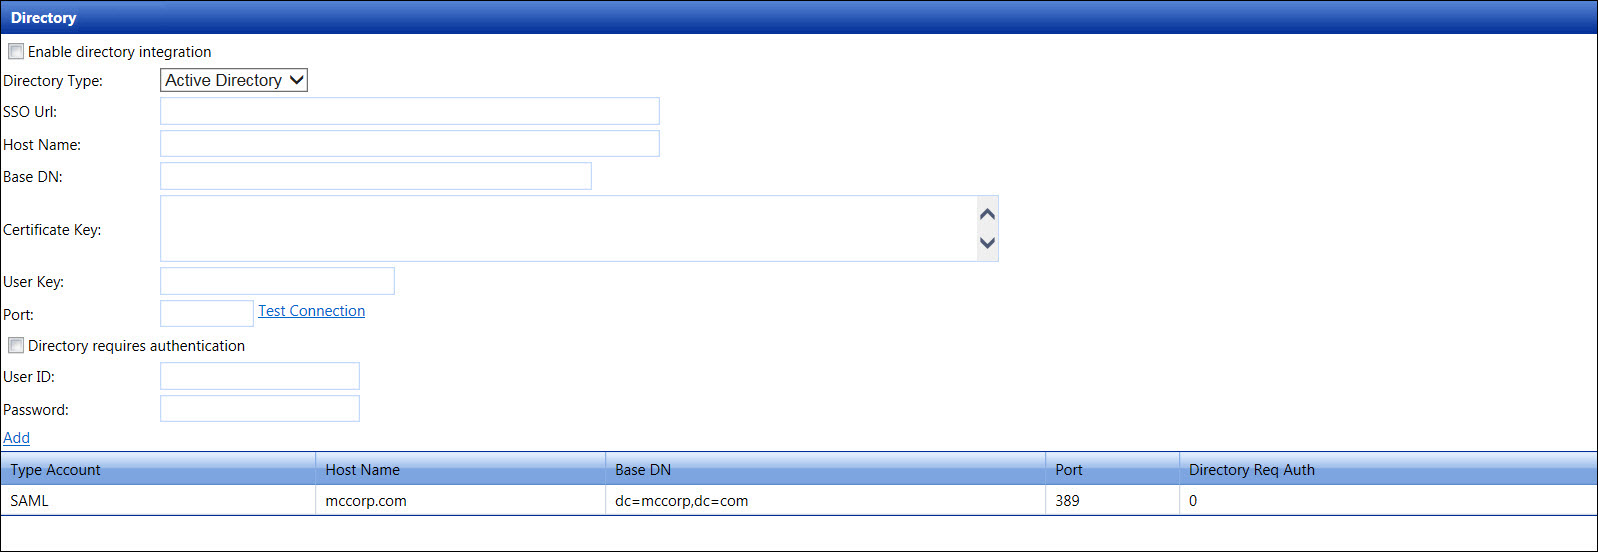
If the new directory setup is active, click the Enable Directory Integration checkbox.
Select a directory type from the Directory Type drop-down list.
Enter the identify provider's URL into the SSO Url text box.
Enter a host name into the Host Name text box.
Enter a base DN into the Base DN text box.
The certificate key is to verify if the directory is pointing to a valid company. Enter a certificate key into the Certificate Key text box.
Click Add to save and add the new directory into the grid.
Refer to Directory Information (for Single Sign-On Setup) to assign directory and enter user ID to an account. Once the account is setup, refer to Single Sign-On Login to use the single sign-on feature.
From the grid, double-click on a line item to open and display the selected directory information on the Properties screen. The Save and Cancel links are displayed.
Directory Type, SSO Url, and Certificate Key are mandatory fields. Make the changes to the selected directory's information.
Since the directory cannot be deleted, the directory can be disabled. If users assigned to the selected directory that is being disabled, then these users will not be able to use the single sign-on feature. Deselect the Enable Directory Integration checkbox to disable the selected directory. Otherwise, proceed to the next step
Click Save to save and display the modifications in the grid.